13 things you can let go of today
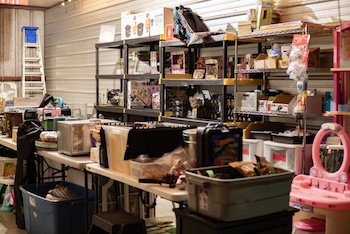
After years and years of helping people let go of excess, it wasn’t hard for me to come up with a list of items that we frequently see people unnecessarily hanging onto. When we work in basements, especially, we almost always see these items. It’s so easy to let them languish there but letting them go creates space (and peace of mind).
Are any of these items cluttering up your home?
- Empty boxes for items you’ve had over three months (possible exception: the box your giant TV came in)
- Packing peanuts and air pillows if you haven’t used any in six months or more
- Paid bills (non-tax-related) that are more than a year or two old (if that)
- Supporting paperwork for taxes filed more than seven years ago
- Clothing that doesn’t fit you or you don’t feel fabulous in
- Supplies for pets you no longer live with
- Outgrown games and toys
- Supplies for hobbies or crafts you no longer do (or never actually did)
- Expired over-the-counter medications or beauty/personal hygiene products
- Leftover holiday cards from years gone by—especially dated ones
- Holiday cards you received from others
- DVDs or VHS tapes you no longer watch
- Damaged or wilted holiday decor
Do a quick sweep of your house this week. If you spot any of the above items, consider letting them go!
Here are some ideas for disposing of these items:
- Take the old paperwork to a commercial shredding service (the big-box office supplies stores offer this service as well)
- Donate clothing, toys and craft supplies.
- Give your unneeded pet supplies to a local animal shelter
- Take the unwanted packing material to a UPS Store (or similar establishment) for reuse
- Let it be easy by calling in a junk hauler if you have large quantities of trash and/or donations
Of course, if you’re in St. Louis and would like some help, please shoot me an email and we can set up an organizing team to help you identify what to let go of (and organize what you decide to keep). We’ll even take your donations with us!
I firmly believe that less stuff = more happiness. A good place to start on your path to less stuff is with these no-brainers!
Budgeting and decluttering: It's all about priorities
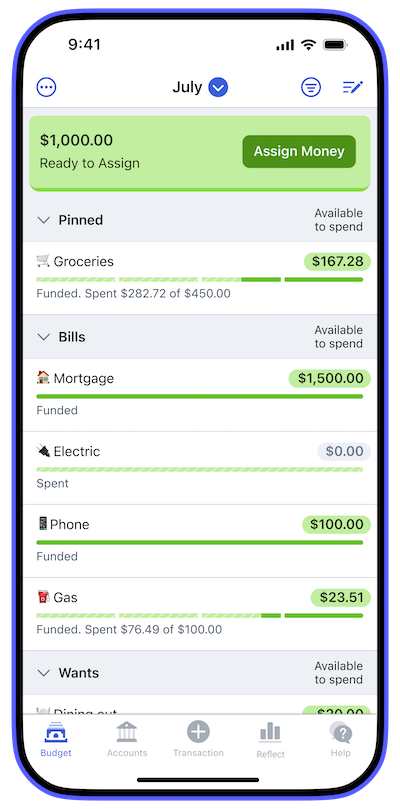
I’ve been helping people declutter excess stuff for 20 years. And for two years, I’ve been helping people take control of their spending with the app YNAB as a YNAB Certified Coach. (Check out my website and blog, Peace of Mind Spending.)
I see a lot of overlap in the work. One thing I’ve noticed is that both decluttering and budgeting are all about priorities.
Before anyone starts decluttering, I encourage them to have a vision for their space and get in touch with why they want to go to the effort to declutter and organize their home. Many people want to entertain, for example. Or just be able to open the door to unexpected visitors. Or they want more ease in their life…being able to get out the door without a mad search for their keys. Knowing what’s important to them helps make it easier to let go of excess.
The same is true of a budgeting: YNAB has coined the term spendfulness.” When you’re living spendfully, you’re spending in alignment with your values and your priorities. If your priority is fun time with your family, for example, it’s perfectly okay to spend money on a Disney vacation, rather than spending it on something else. If you struggle with credit-card debt, knowing that your priority is to get out (and stay out) of debt makes it easier to be more mindful about cutting back on extras until the debt is paid off. (And continue to live spendfully once you’re out of debt.) YNAB helps you see where your money is going and allocate your money according to your priorities.
Not incidentally, in the podcast I co-hosted for five years with Shannon Wilkinson, Getting to Good Enough, we mentioned virtually every week that the key to letting go of perfectionism is to get in touch with what is important to you. It’s a recurring theme in my life.
I’ve been doing this work so long that I feel pretty in touch with my priorities. How about you? Do you know what’s important to you about your home? How about your spending? Do you know where your values and priorities lie when it comes to money?
If you feel you need clarity, spending some time reflecting on your priorities and perhaps discussing them with those who share your life might create a North Star to guide you. It’s a worthwhile exercise!
Today's truth bomb
After 20 years of organizing, here’s something I know is true:
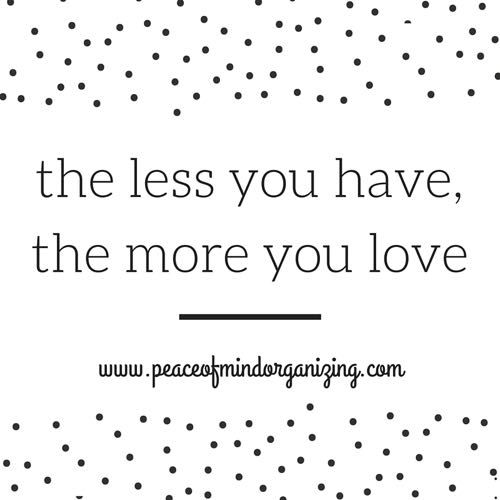
It’s much easier to appreciate your belongings when you have fewer items. For example, if you inherited your grandmother’s tea cup collection, select a favorite and put it where you can see it. Then you can treasure it. That’s much better than letting the whole collection sit in a box in the basement.
If space is at a premium for you, try picking out the most special item in a collection and give away the rest. When you keep less stuff, it’s easier to love what you have.
Worth repeating: Labels in the refrigerator
I originally wrote this post ten years ago and was delighted to come across it again today. My message hasn’t changed, though I have to confess I never did label my own refrigerator.
I love labels and I talk about their value all the time. Recently, I wrote on Organize Your Family History that when I see a failed organizing system in a client’s home, I almost always notice the absence of labels.
Labels help you clarify categories and make it easier for you and the people in your home to find and put away items.
When I bring in an Operation: Peace of Mind team, I always try to make sure we label everything so that the client has no difficulty adapting to his or her new organizing systems.
At a recent session, we had the delightful opportunity to go whole hog when the client asked for labels inside the refrigerator. Working with the client, we created zones for various categories of items and came up with labels that were meaningful to the client.
Check out these photos of each refrigerator door:
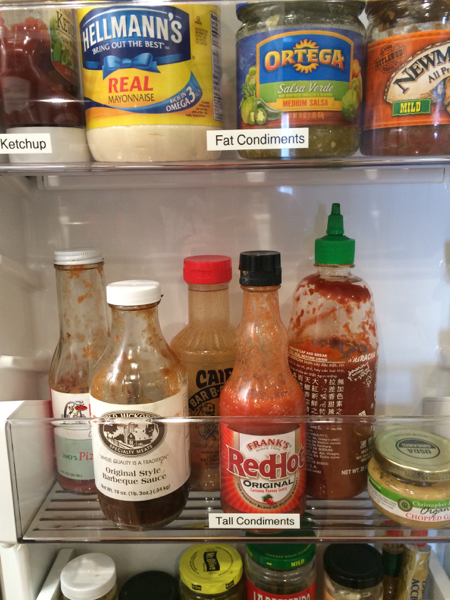
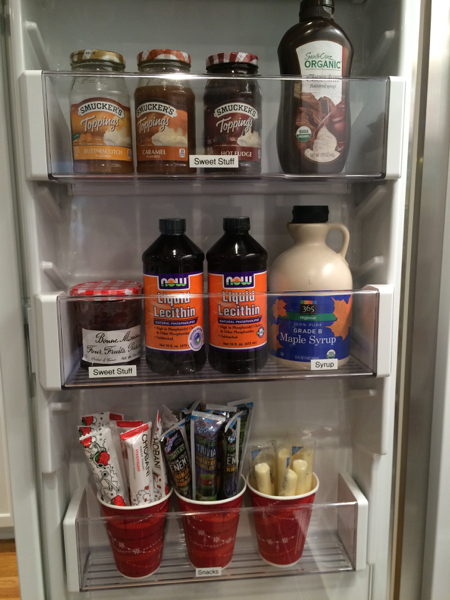
The main area of the refrigerator was fully labeled as well. I’m afraid my photos don’t allow you to read the labels easily. But you can get the idea of how many zones/labels we created.

A couple of days after the session, my client shared this with me:
I didn’t realize just what a benefit the labels and zones would be. The labels enforce the organization, and the zones really help with the grocery shopping! I took that mental picture to the grocery store last night. Labels in one’s fridge somehow seem weirder than labels other places, but I’m realizing it makes more sense than anywhere!
About six weeks later, she wrote:
I find myself automatically putting stuff in the right place in the fridge if I find things where they don’t belong.
As a professional organizer, that is music to my ears!
I’ve never wanted to put labels in my own refrigerator. It seemed a little hyper-organized, plus I knew it would make my husband feel constrained. However, after seeing this client’s refrigerator and hearing how well it’s working for her, I have to admit I’m tempted!
What about you? Do you have labels in your refrigerator? If not, does it appeal to you?
The meat of my Bullet Journal
In recent posts, I’ve talked about the spreads I put in the beginning of all my Bullet Journals and the ones I repeat throughout an individual journal.
Today I want to talk about what I write in the bulk of my Bullet Journal. I do what BuJo creator Ryder Carroll calls “rapid logging.” Every day, I jot down the tasks for the day, adding more throughout the day as they come to mind. I use a bullet to indicate a task and when I complete the task, I put an X over the bullet. I also jot down notes when I’m on the phone or in a meeting; those entries, which are mixed in the task entries, are preceded by a dash.
I start a new day’s entry right where I left off the prior day, so that I don’t waste any space in my journal. I start each day with a Washi-tape sticker indicating the day of the month. (See my post on my go-to BuJo supplies.) Then I write the day of week the using a colored marker (either a Zebra Mildliner or a Sharpie S-Note Duo highlighter). That becomes my color of the day.
When I fill up a page, I start a new page and draw a line in the color of day and write the date in that line. (That’s why I like to use a highlighter for the day’s color.) Then I keep taking my notes.
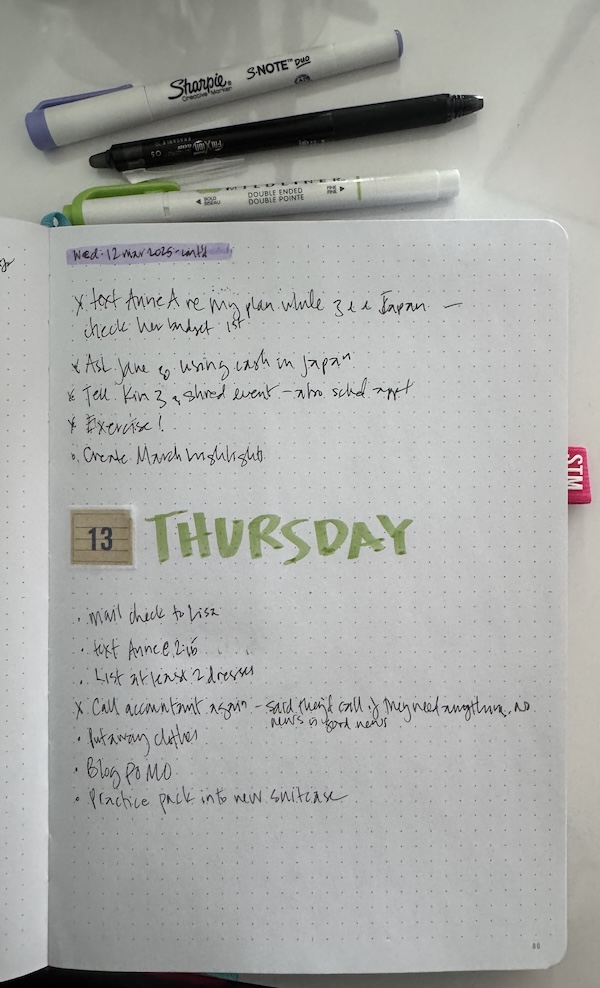
If I’m taking notes for an important meeting, webinar or video, one that I know I want to be able to spot easily, I’ll a make a meeting header. Usually that happens in faux calligraphy using the day’s color to highlight the downstrokes. Sometimes I do it bold letters with a highlighter.
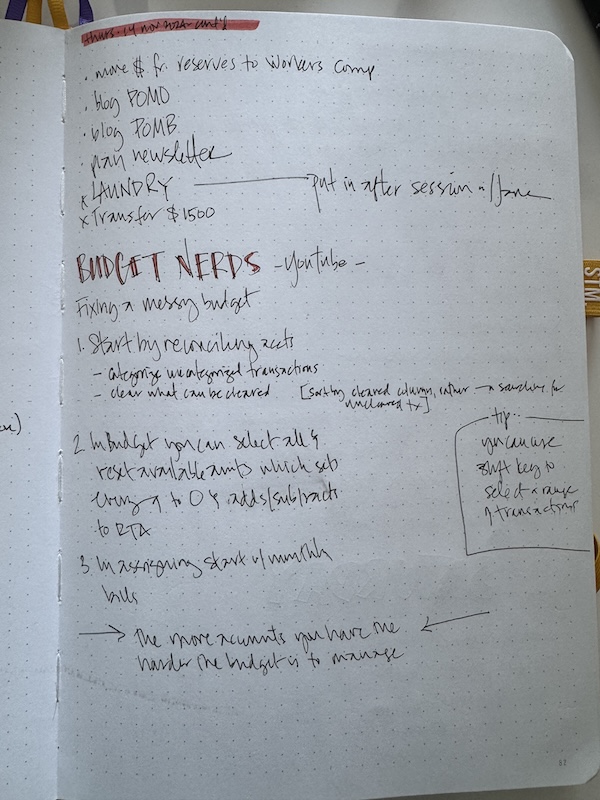
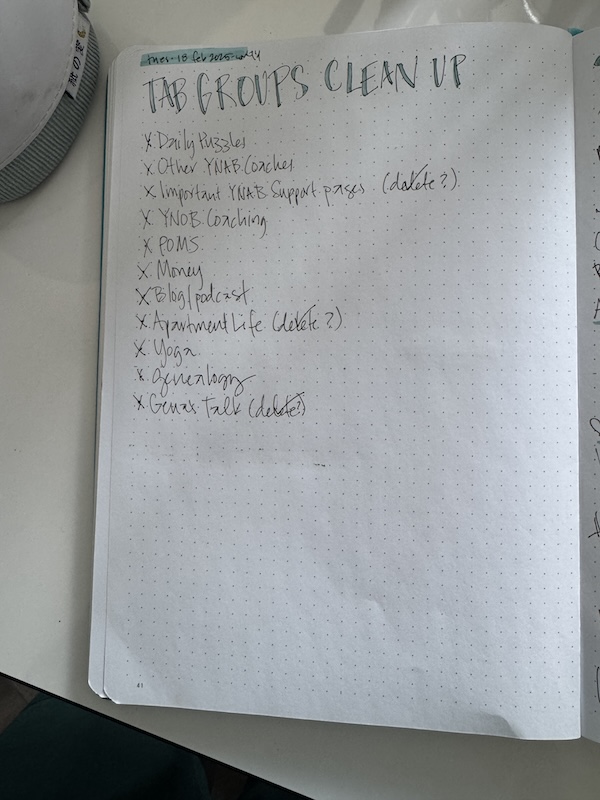
Sometimes I’ll have a little project that needs a checklist or I want to reflect on something when I’m trying to make a decision. I’ll often start a new page for that and give it a special header.
Once a week, as part of my end-of-the-week routine, I go through the week’s pages and add pertinent page numbers to the index at the beginning of the journal. And once a week I write a task list for the coming week. Occasionally I’ll write a task list at the beginning of the month, but a weekly task list usually does the trick for me.
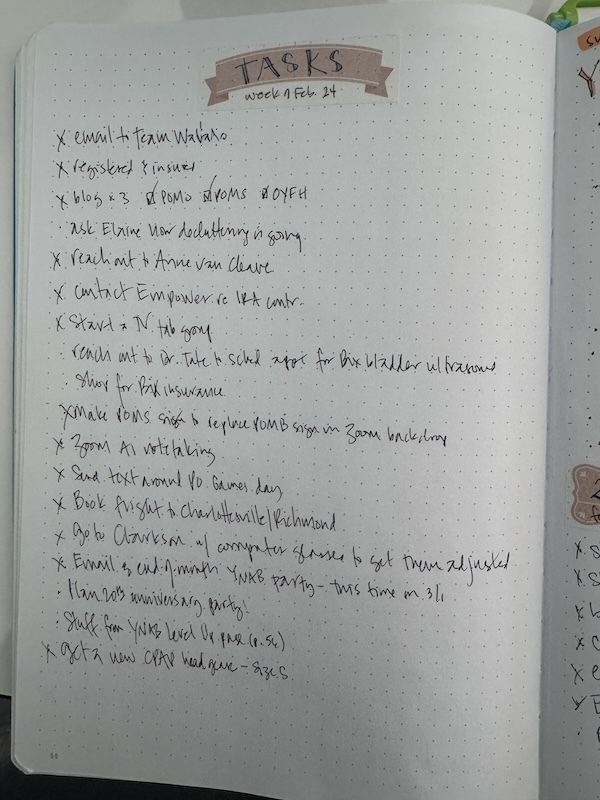
As you can see, I don’t put a lot of effort into perfect penmanship or lettering. Bullet Journaling isn’t a creative outlet for me, it’s a very practical, highly productive practice that helps me stay on top of things.
I’m on my 17th Bullet Journal since January 2022 and this system has worked well for me for the past three years. I can page through my current journal and find what I need without much effort. I can go back to old journals and find what I need fairly easily as well (though I don’t need to often).
There is no one right way to Bullet Journal—that’s one of the beauties of it. This is just the way that works for me. I’m hoping this peek into my journaling will help or inspire you if you’re looking to get started with a Bullet Journal!
Worth repeating (again): Getting past "I might need it some day"
I wrote this post back in 2018. Now, as then, “I might need it some day” remains one of the most often-heard reasons clients have for hanging on to items they no longer use or love. I wanted to repeat this message again, because if you’re dealing with clutter, you can’t hear it enough.
One of the most common reasons folks (including me) tend to hang to items that they use or love is that they feel they might need it at some point in the future and they fear regretting that they let it go. If you live in a home with plenty of storage space and you’re organized enough that you can find the item when you need it, then this might be no big deal.
But if your home is crowded with “I might need it some day” items, or you don’t have any systems in place to allow you to store the items where you can find them again, you might want to consider asking yourself these questions to get past that barrier:
- What are the chances I’ll need it?
- Will this item likely be the best choice at that time (considering that clothing goes out of fashion, technology becomes obsolete, books go out of date)?
- Would I be able to buy a new one if I did end up needing it?
- What’s the worst that could happen if I did find I needed an item that I had I let go?
- What’s more expensive: replacing the item down the road or hanging on to it indefinitely?
That last point is particularly potent when you pause to consider the cost of keeping stuff you don’t need or love. When your home is crowded with unloved or unused items, it often makes it harder to find the stuff you do love and use. There’s a physical and emotional cost of keeping unwanted items “just in case.”
Sure you might need that item in the future, but if what you need now is more space and order, then perhaps letting it go is the most beneficial course of action. I’ve been a professional organizer for 20 years and I’m constantly reminded that our lives become so much easier when we let go of excess.
Furthering your goals one tiny step at a time
I’ve been trying to exercise more and build strength, balance and flexibility. I’ve hired a trainer, who has been really helpful. But I’m also on the lookout for small changes I can make that will contribute to that goal.
I created one for 2025 that’s been amazingly easy to implement and that I hope will make a difference:
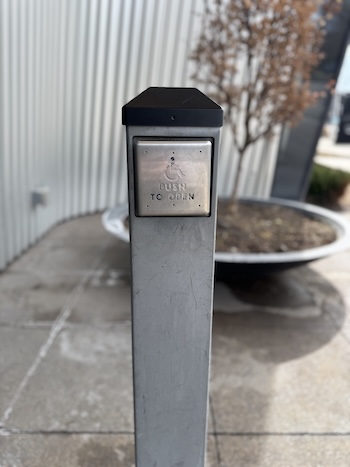
I stopped using automatic door openers.
I live in a high-rise apartment building and, naturally, there are buttons to press to open the building’s heavy doors to the outside and to the elevator lobby. (They’re intended for people with disabilities to use.) Going in, you hold your fob to the lock, then when the light turns green, you can push a button that will open the door. Going out, it’s the same thing but you don’t have to use your fob.
I decided at the beginning of the year to pull or push open the doors, rather than pushing the button. There are, I think, six doors in our building that have automatic openers. When I first moved in, I would push the button without thinking about it. Now I never use it. I can’t help but think that using my arm muscles this way six or eight times a day will help me become more fit!
The thing that amazes me is how easy it was to make the change because it’s such a small thing. It was more of a mindset shift than anything.
Are there tiny things you could do to help further your goals? Maybe it’s parking further away from the store to get more steps in. Or taking the stairs instead of the elevator.
Or maybe it’s putting your keys in a designated spot each time you enter your home so you don’t have to look for them when it’s time to leave. Or putting your dirty clothes in the hamper, rather than leaving them on the floor. That’s a small thing that can make a big difference.
I encourage you to keep your eye out for little changes you can make in your daily life to help you reach your goals more easily!
Search
Recent Posts
- 13 things you can let go of today
- Budgeting and decluttering: It's all about priorities
- Today's truth bomb
- Worth repeating: Labels in the refrigerator
- The meat of my Bullet Journal
- Worth repeating (again): Getting past "I might need it some day"
- Furthering your goals one tiny step at a time
Tags
Links
- National Association of Productivity and Organizing Professionals
- Getting to Good Enough podcast
- Organize Your Family History
- Ravelry
- Peace of Mind Spending
- Institute for Challenging Disorganization
- Shannon Wilkinson, life coach
- NAPO St. Louis
- Are you interested in becoming a professional organizer?

