Worth repeating: The kudos file, a great self-care tool
I originally wrote this post several years ago and when I came across it today, I smiled at the advice. Do yourself a favor and create a kudos file you can look at it when you need a pick me up!
What do you do with nice little notes you receive from people? You know, the ones that make you feel good or help you know you’re on the right track. I’m not much a keeper of cards and the like. I discard holiday cards when the holidays are over, though I have kept the lovely notes sent me after my mother’s passing in 2015.
But every now and then I get a card or an email that compliments me or lets me know I’m making an impact. Those notes make heart happy. And I don’t want to toss them. Years ago, I created a kudos file and that’s where I put those cards. (I’ve even been known to print out a particularly wonderful email and file it.)
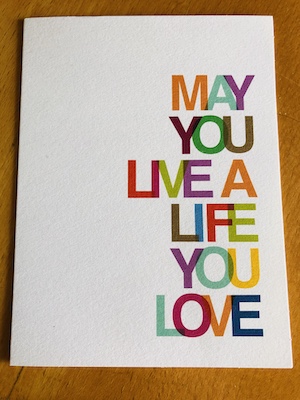
I received a lovely card (pictured here) recently from my colleague Lynne Poulton of Wholly Organized complimenting the podcast I host with Shannon Wilkinson, Getting to Good Enough. It’s so rare nowadays for people to take the time to put pen to paper, especially when it’s so easy to email or text. I was so touched by her words and her effort and, of course, I filed it in my kudos file. While I had the file open, I was surprised to see how thick it was. I’d been filing into it but not really looking in it.
So today, I pulled out the kudos file and read through all the cards and notes in it. Most of them I don’t remember ever receiving. And I had a very enjoyable 15 minutes or so feeling the love. To me, that’s real self care.
Do you have a kudos file? If not, I encourage you to create one. (Pro tip: Jot a date on a card before you file it; I wish I had.) If you do have a kudos file, when was the last time you looked in it? It might be nice to pour yourself a beverage and curl up with it for some good reading. It’s bound to make you feel good.
Check out my interview on DocWorking podcast!
I was interviewed recently by Jill Farmer for DocWorking: The Whole Physician Podcast. Jill, who is a life coach with many physician clients, and I talked about impact of clutter, the difficulty of decluttering and how perfectionism can get in the way, particularly as it applies to physicians (but really to everyone).
Jill and I go way back—we gave presentations together ten or more year ago. She’s so smart and is such a terrific interviewer.
You can listen to the episode (#148) at the link above or wherever you listen to your podcasts. If you like to read rather than listen the transcript is also available at the link above.
The interview was conducted on Zoom and recorded, so if you prefer to watch it here you go! (That’s my friend Mandy’s adorable dog in the picture.)
Worth repeating: Styling your Zoom backdrop
I wrote this blog post only a year ago, but I think it’s such valuable information I wanted to share it again. I am so grateful for my easy Zoom backdrop that looks good and requires no effort!
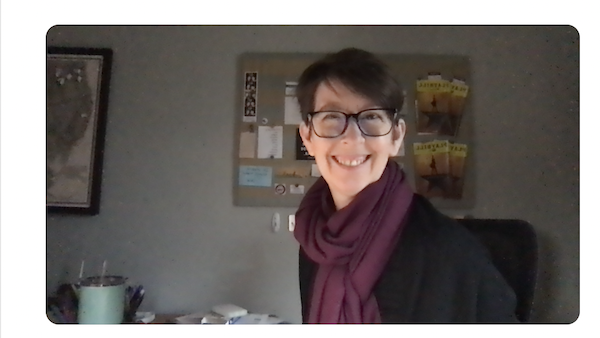
Before 2020 I very rarely talked with anyone via video. But then the pandemic hit and just like that Zoom became a way of life. I started out mostly chatting with friends, but gradually I started doing consultations with clients via Zoom (or occasionally FaceTime). I used my laptop’s webcam, which is at about 90 degree angle from the big external monitor I ordinarily face. When I’m using my computer, facing that monitor, I have a bulletin board on my left.
The result was that when I turned to face my laptop’s webcam, my bulletin board was my Zoom backdrop. I love my bulletin board and it contained things that make me happy (like my Hamilton Playbills). But as a Zoom backdrop it was quite cluttered and distracting. That view also showed the top of my desk, which meant I usually had to tidy up before going on Zoom.
See what I mean?
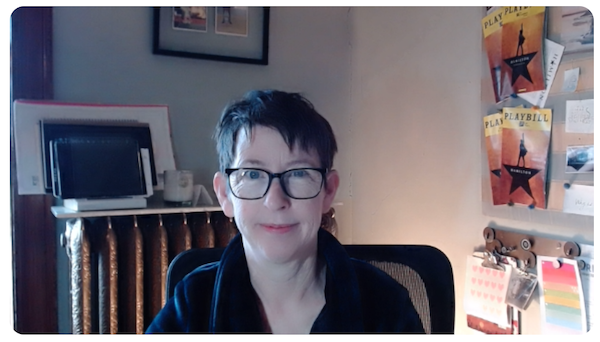
Once I started doing presentations via Zoom, I realized it was time to up my game. I purchased a Logitech webcam that I attached to my external monitor in front of me. So the backdrop completely changed, as you can see in this picture.
Then I did something really smart: I asked my friend, Geralin Thomas of Metropolitan Organizing to advise me over Zoom how to style my backdrop. We styled it in real time, with her sending me around my house looking for items that might work. At the end of the session, I had a short shopping list of things to purchase to fill things out.
Geralin has helped me with my wardrobe for years and she’s been a guest in my home. She knows that I have a minimalist approach to home decor. We spent some time on the lighting and adding a few touches of decor to the top of the radiator and the wall. (I have to share that the painting above the radiator was created by my dog, Bix.) We cleared off the bulletin board, except a small area not visible in the webcam shot.
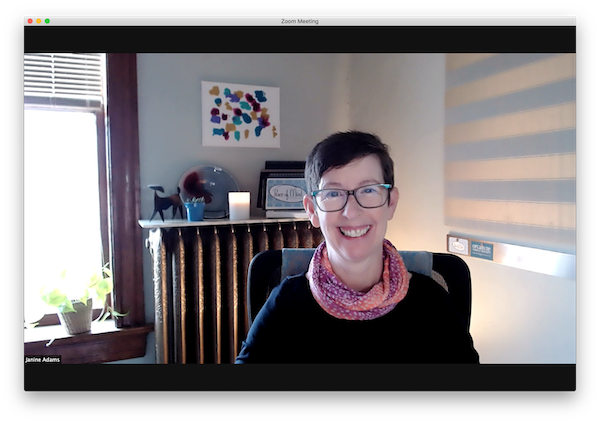
Here’s how it looks now. So much more peaceful. And there’s even a little business branding!
Here are some of the things I learned in that session, supplemented by information from an email exchange I had with Geralin while I was writing this.
Considerations when creating a Zoom backdrop:
- Try to make it reflect your personal style and values.
- Keep your backdrop uncluttered but not too spare.
- Keep it simple enough that you don’t have “set dress” before every Zoom call.
- Pay close attention to your lighting and make sure you have lighting both in front of you and behind you (see below).
The right lighting can make all the difference. Geralin had me put a table lamp on the floor behind me. She also had me put a goose neck craft light next to my monitor at a level that doesn’t cause too much reflection in my glasses. (I set it on a thick book to raise it to the appropriate level.)
Lighting can be particularly challenging to those who wear glasses. Here’s what Geralin told me about that: “Lighting from above and below will illuminate you but not reflect in your glasses. If you’re wearing glasses you’ll need to make sure that the lighting directly in front of you is blocked to avoid glare.” It took quite a bit of trial and error to get my lamp position right to avoid glasses glare. (I also tried to let go of trying to make it perfect. Sometimes there’s a little glare and I live with it.) Geralin also cautions glasses wearers to be aware of the light of your computer screen reflecting in your glasses at night. “You fix this this by raising the light source a little above your head and leaving a little bit of light below your eyes so your chin and neck have light.”
I’m easily overwhelmed by all of this stuff, so having a trusted expert to help me was so helpful. And I am delighted with the results.
If you’d like Geralin’s help with styling your Zoom backdrop, just schedule an Ask Me Anything call.
Keeping you organized at Disney World
With travel starting back up again in earnest, I invited my friend Julie Hough to write a guest post to help you make the most of your Disney vacations. Julie is a former professional organizer (and POMO team member) who is now a successful Disney Travel Planner and she’s all kinds of wonderful. I will echo Julie’s eighth point: If you are thinking about a trip to Disney, let Julie make it easy! She can plan your entire trip and make all your arrangements at no cost to you. (Be sure and check out her client testimonials!)
Eight Organizing Ideas for Your Next Disney Vacation
by Julie Hough
If you’ve ever planned a trip to Disney World, you know there are a lot of moving pieces. Narrowing down the resort choices, choosing the best ticket type that meets your needs, keeping track of Dining Reservations, figuring out the new Genie + and Individual Lightning Lane systems, planning your days to keep your time waiting in lines to a minimum (and more) can make a person feel overwhelmed. This is supposed to be The Happiest Place on Earth! My role as a Disney Travel Planner is to take the bulk of the stress off your shoulders and organize the details (big and small) so that you can have FUN.
The next time you create your packing list for Disney, consider including the below organizing ideas. These small, practical ideas won’t break the bank but they will take some of the chaos out of the trip and usher in a little more calm and freedom to enjoy the Magical Moments of Disney. (All of the product links are for example purposes only.)
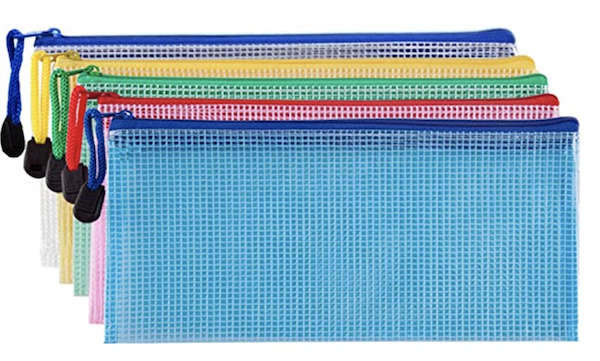
1. Pack a letter-size envelope or zippered pouch to keep your Disney receipts organized. From meals and snacks to merchandise purchases, you’ll end up with a ton of receipts at the end of the week. You don’t need to keep them forever – but it’s a good idea to hang onto them to reconcile your bill after you come home. Shout out to my colleague, Lisa Gallegos, for this easy yet extremely helpful idea.
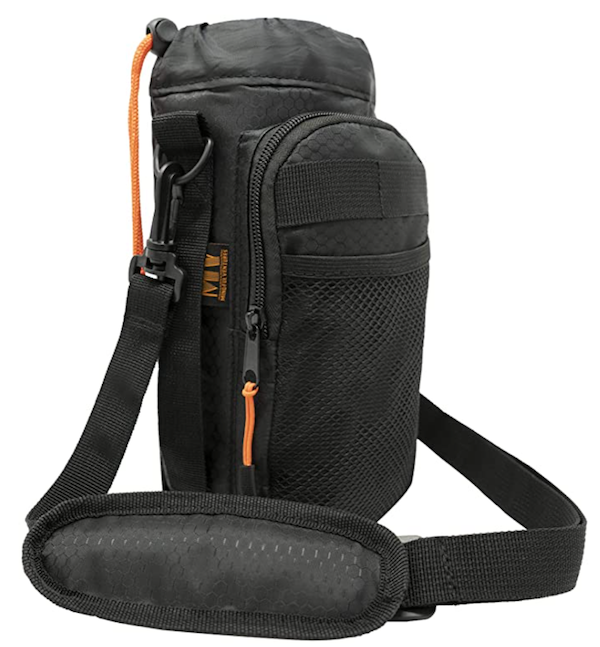
2. A cross-body water bottle holder is helpful at keeping your water bottle handy without having to take off your backpack each time you want a drink. And walking around the parks all day, you want to stay hydrated! This one also has a pocket for your phone to give you easy access to the Disney World App, which you’ll use all day long.
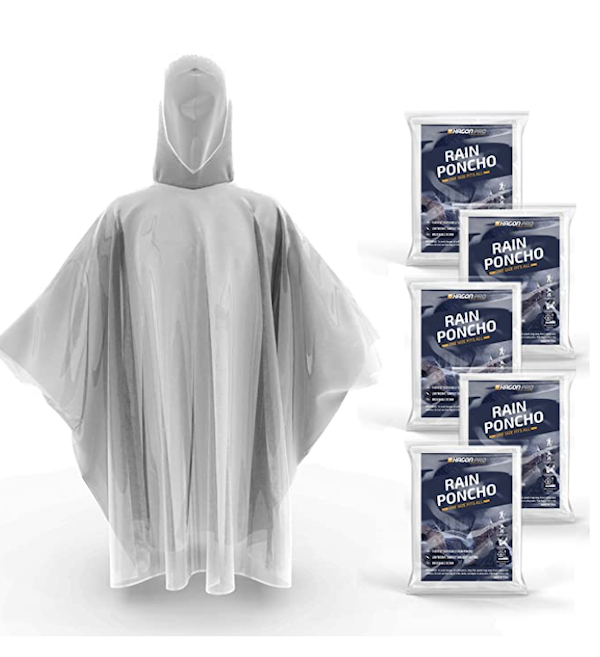
3. Pack disposable ponchos for rainy days and wearing on rides that get you wet. They are a lot less expensive at Walmart than inside the parks.
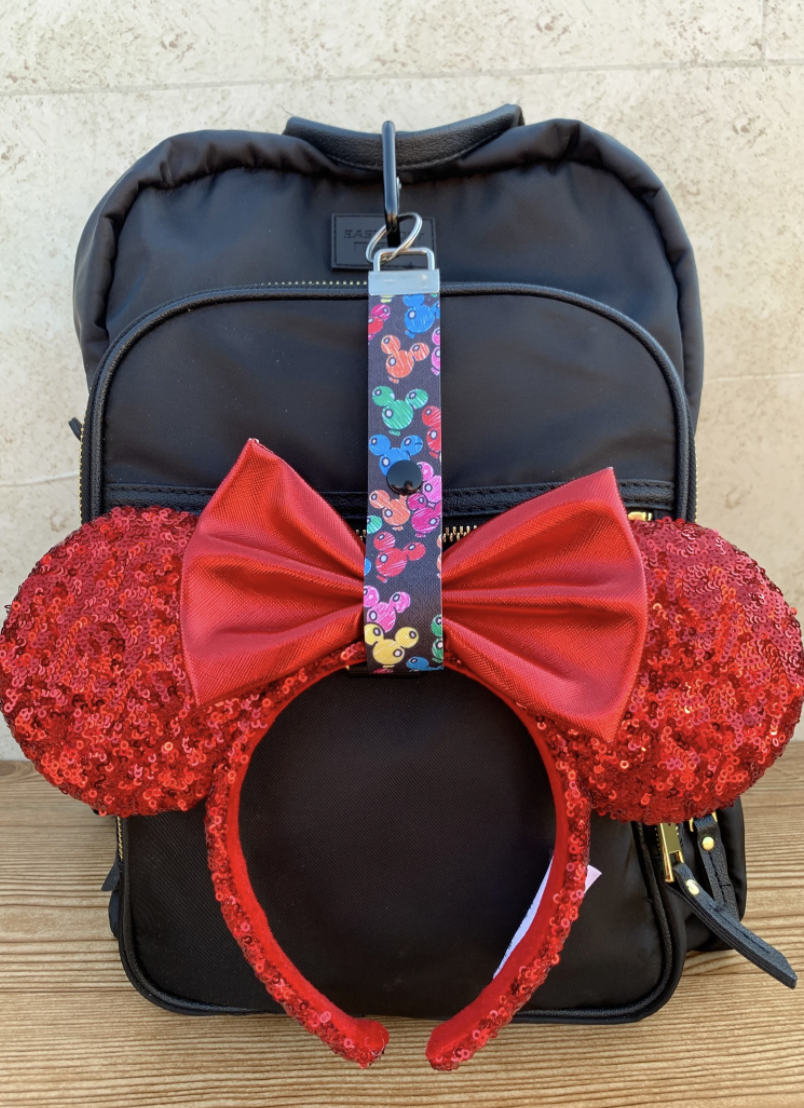
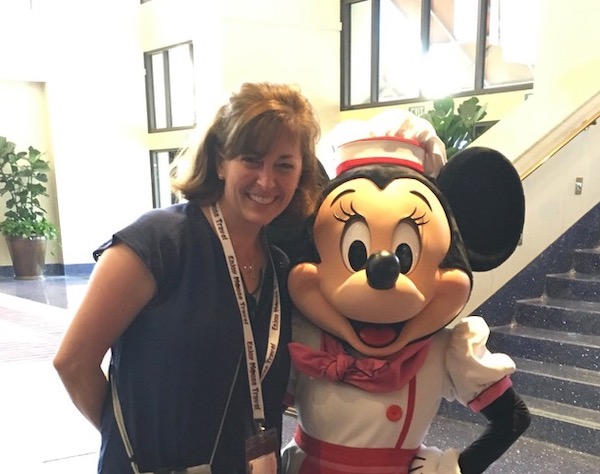
4. Who doesn’t love wearing a pair a sparkly Minnie ears around the park? But after a few hours, your head might need a break. These Ear Holders are handy and helpful!
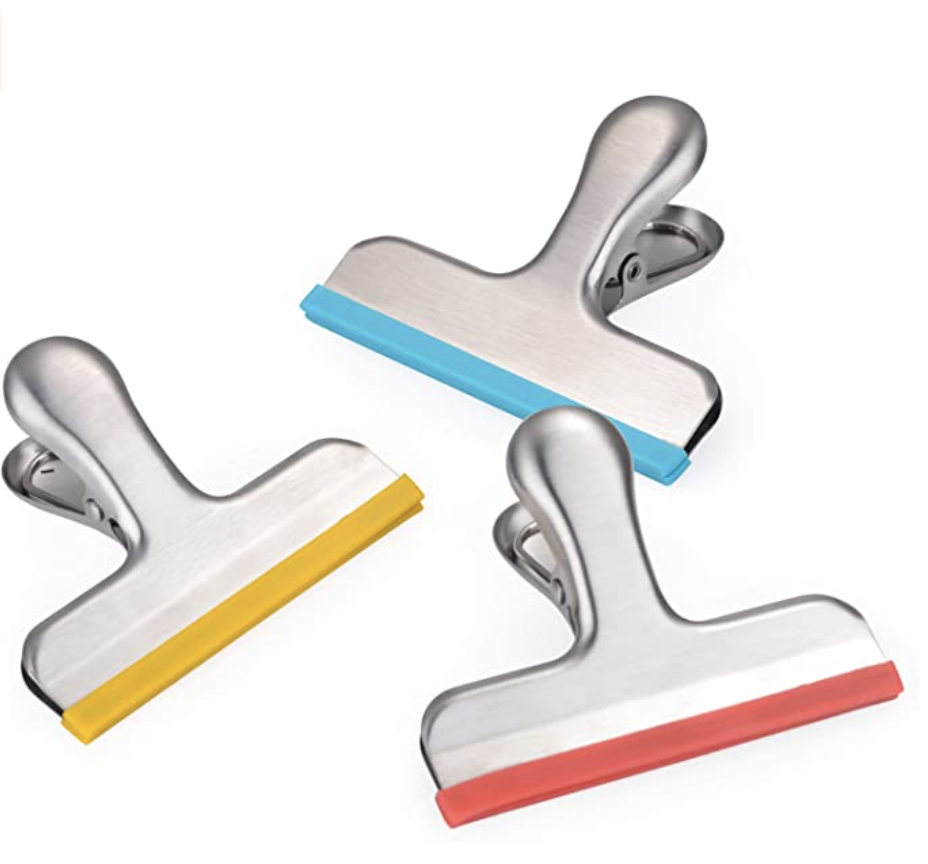
5. After a full day of being in the park, you will be ready for a good night’s sleep. When you draw your curtains in your room, sometimes there can be a gap that can let in the moonlight. If you need total darkness to sleep well, pack a couple of large binder clips or sturdy chip clips to close the curtain gap.
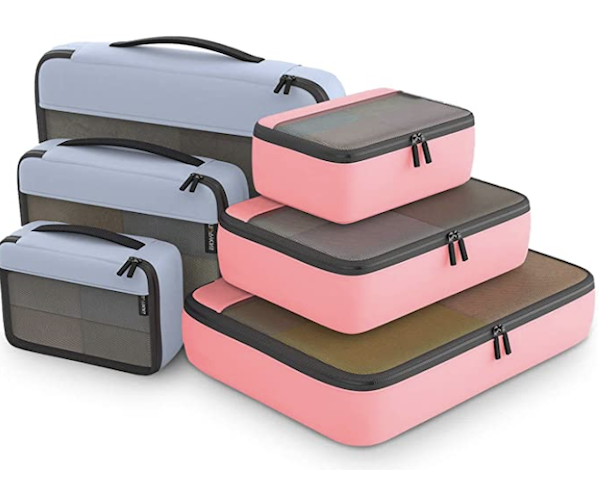
6. Packing Cubes can keep your clothing organized not only in your suitcase, but in your resort room as well. They come in multiple sizes. I recommend labeling them by category: “Socks, Underwear, PJ’s”, “Outfits”, “Swim Suit and Coverups”, “Shoes”, etc..
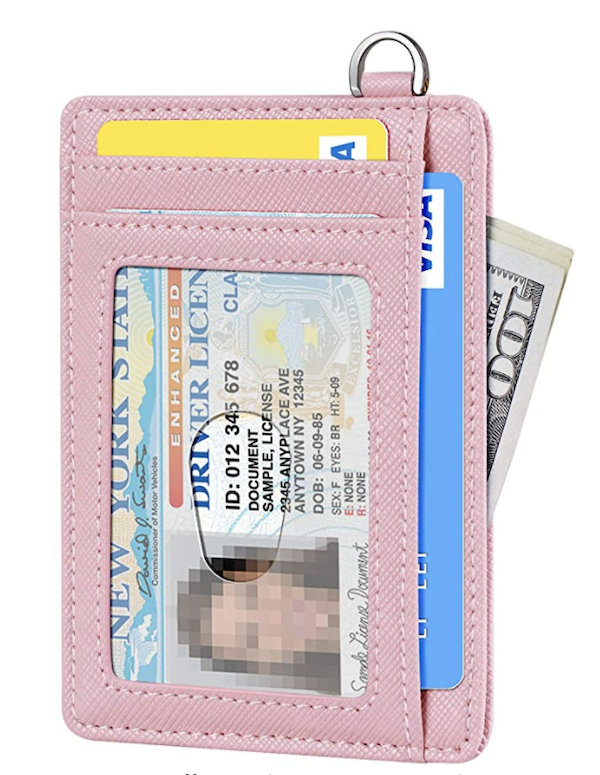
7. With the Disney App and/or the use of Disney’s Magic Bands, there is no need to carry around your normal sized wallet in the parks. However, it is wise to carry your ID, your insurance card, and one credit card – just in case. A mini-wallet, with RFID, does the job.
8. Book your trip through me. It doesn’t cost you a thing, and I’ll organize your entire trip for you. It really is my joy to help my clients get the most out of their Disney trips.
You can contact Julie at Julie@enjoymousetravel.com or via her website, JulieHough.com. You’ll be glad you did!
Organizing my Bullet Journal supplies
Last week, I blogged about my love for my Bullet Journal. When I decided to start using this method, I did a little research on supplies and how to organize them so they’re handy for daily use. This is what I settled on. It’s working out well!
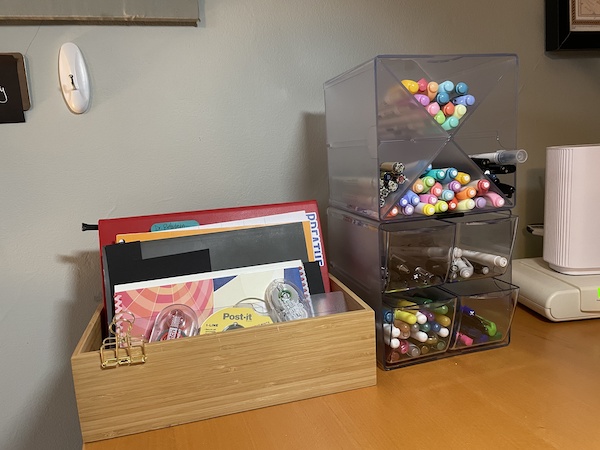
I have a little wooden box where I store my Bullet Journal and non-pen supplies. Next to it is a cube system that stores my pens in eight different categories.
I saw a YouTube video from Lauren Fairweather describing how she stores her pens. She recommended the Deflect-O Stackable Cubes. I was drawn to the compact footprint and the ability to create categories while storing a lot of pens. I ordered it from Amazon and it’s been great. (Deflect-O Stackable Cube with 4 Drawers and Deflect-O Stackable CubeDeflecto with X Divider.)
Here are pens in their cubes (I opened the drawers a little so you could see the pens better):
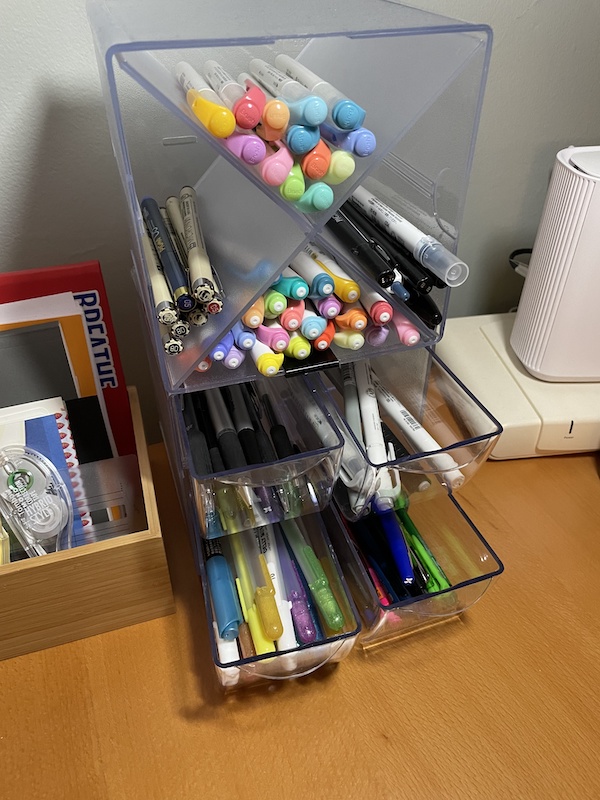
In case you’re interested, my pen categories are:
- Mildliner brush tip
- Mildliner chisel tip
- Pigma Micron pens (my preferred pens for writing in my journal)
- Black brush pens
And in the drawers:
- Other fine line black pens
- Neutral markers
- Metallic and white gel pens
- Extra fine pens in colors
By far, the ones I use the most are the Mildliners and Micron pens. Every day I pick an accent color for the day and use both the brush and chisel pens to write the date and highlight what needs to be highlighted. That allows me to tell the days apart easily when I’m leafing through my journal. And it makes it pretty!
In that little wooden box to the left of my pens I store the non-pen components of my Bullet Journaling. I love that everything fits neatly in this open box and that’s easy for me to get stuff out and put it away. In the box I store my Bullet Journal when I’m not using it, as well as the previous BuJo, some stencils that I had (and, frankly, haven’t used much), a couple of straight edges and four handy little things:
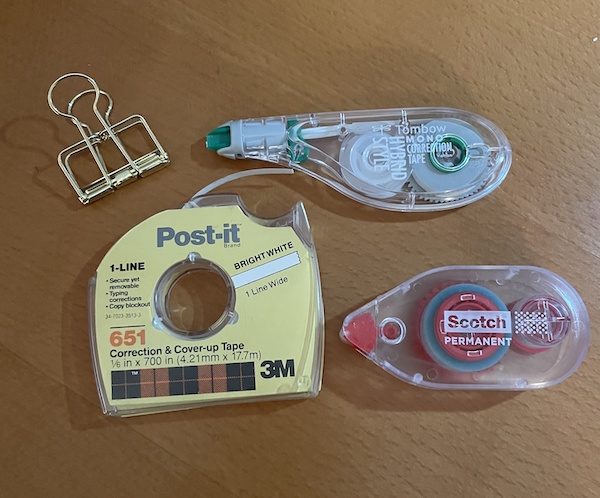
- A pretty binder clip for holding open the page when I’m taking a picture for the Bullet Journal Companion app
- Tombow mono correction tape
- Post-it® one-line correction & cover-up tape
- Scotch® double-sided adhesive roller
I try to embrace imperfection in my Bullet Journal, but sometimes I make mistakes that I want to correct. The Post-it® tape is great for small one-line corrections. It’s easy to write over and easy to remove. But for bigger corrections or ones that are a different shape, the Tombow correction tape is excellent.
I use the Scotch® double-sided adhesive roller if I get a little crafty and want to tape some things into the journal. Here’s an example from my January tasks page.
It allows me to be a little bit fanciful without going crazy.
I love to acquire and organize office (and art) supplies. I’m glad I have a compact system for organizing my Bullet Journal supplies that keeps everything within easy reach. These two organizers take up a footprint of only 6 inches by 16 inches on desk. And they make it easy for me to make my Bullet Journal a little decorative with little effort.
My love for my Bullet Journal
If you’ve been reading my blog for awhile, you know I love electronic task management. I made the shift away from paper years ago, primarily so I would always have my task list with me. In 2020 I created a Daily Task Management Trello Board that I was over the moon about. It was automated and worked really for me for more than a year. And then it stopped working for me.
As my love for my Trello task management board started to wane (I still use Trello for lots of other stuff), I started creating hand-written task lists. I enjoy doing hand lettering, so I would use my daily task list to practice my lettering. That worked for task lists, but I longed for a better repository for everything else.
Then, in mid-December, it hit me that I should give Bullet Journaling a try. I’d been aware of the Bullet Journal concept since Ryder Carroll published a website about it maybe 10 years ago. But it always felt laborious to me. My friend and podcast co-host, Shannon Wilkinson has been using a Bullet Journal since it first came out but that wasn’t enough to sway me. Until now.
Here’s the concept: The Bullet Journal is a bound notebook in which you hand-write everything. It can be as simple or as complicated as you like. I prefer the minimalist concept that is closer to Ryder Carroll’s original concept (check out his website to see what I mean). If you search on Bullet Journal on YouTube, you’ll see that a lot of people create videos of gorgeous, creative spreads that seem impossible for mere mortals like me to live up to.
These are the components of my Bullet Journal:
- The index so that I can find the key pages I need (I set aside 4 pages)
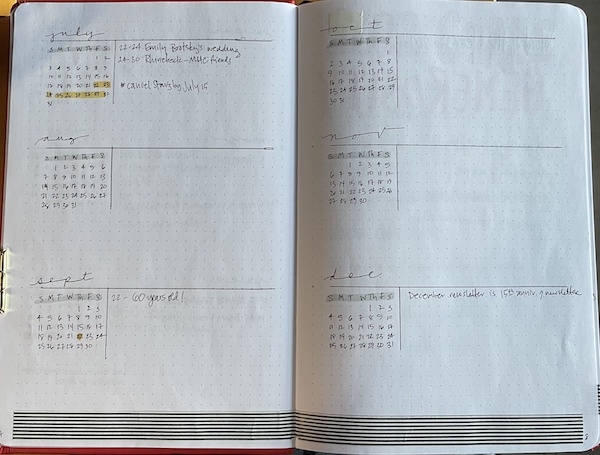
- The Futurelog, with all 12 months of 2022 written out so I can jot key dates like trips or important follow-ups
- A page for my Word of the Year (Generosity)
- A page for my 2022 goals
- My monthly log and habit tracker
- My task list for the month (3 pages)
- My daily log
Here’s a photo of my Futurelog. There are many different ways to do it, but this is the one I’m trying out. So far it works for me. With it, I’m embracing imperfection.
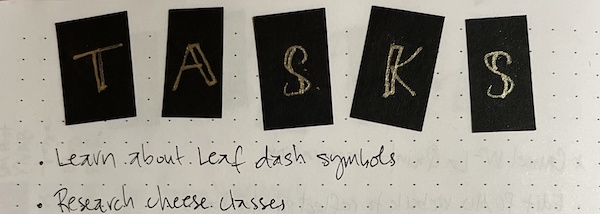
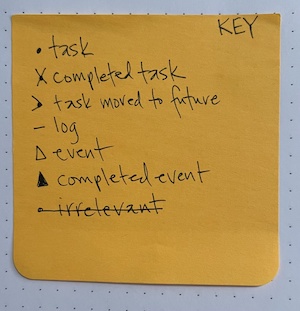
The meaty filling of my BuJo sandwich is the daily log. I write the day of the week and the date at the beginning of the day, followed by the high and low temps expected for the day. I write three things I’m grateful for from the last 24 hours. After that, I write tasks and record actions as they happen. That’s my key pictured at the top of this post. There’s too much personal information for me to post a picture off the daily log itself.
When I have a meeting, I take notes in my journal, right there in the middle of the day’s log. Each page is numbered and I’ll add the meeting and its page number to the index, so that if I need to go back to the notes for that meeting, I can easily find it.
I also have pages for TV shows and movies I want to watch, as well as books I want to read and blog post ideas.
One of my favorite aspects of my BuJo is the monthly log and habit tracker. There are five things I like to do every day and I check off when I do them. I also write down something notable from the day. Here’s a photo so you can get the idea:
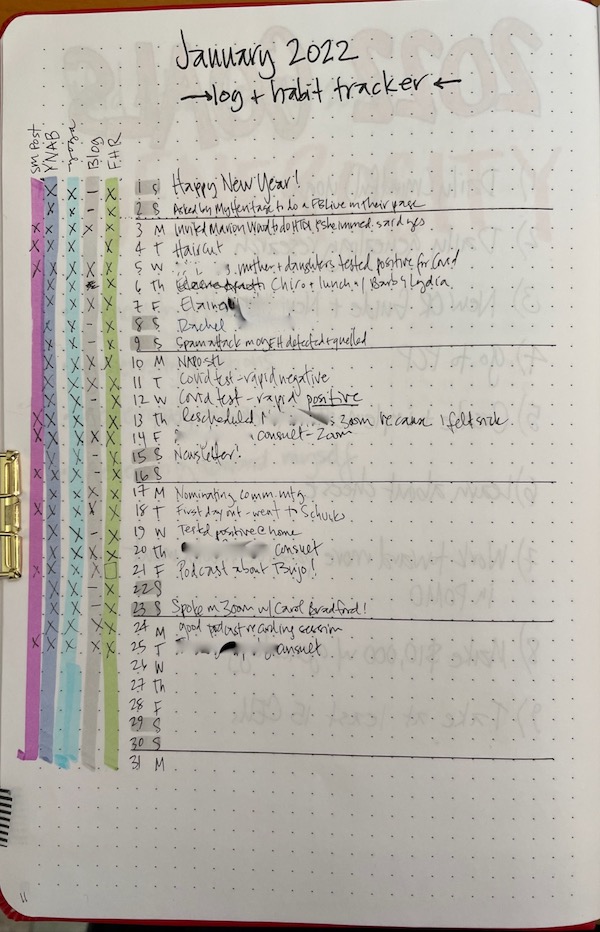
It’s far from perfect but it’s extremely functional and it suits me well.
One of the reasons I loved electronic task management was that I could always refer to and add to my task list on the fly. I don’t always have my Bullet Journal with me, but I do have an electronic solution. There is a Bullet Journal Companion App that allows for an electronic library of photos of each page of your BuJo, plus a place to temporarily record tasks until you add them to your journal. The tasks added in the app disappear after a few days, so it’s really just a holding place—and the app reminds you to transfer the information to your paper journal. I like this because it ensures that I’m not keeping two nonidentical journals (one on paper and on in the app), which would be a recipe for disaster.
I’m definitely in the honeymoon phase of my Bullet Journal, but I really do love it. Since I spend a lot of time at my desk, rather than in the field working with clients these days, having a paper journal is very easy because it’s always with me. I’ve developed habits and routines that help me keep everything up to date and I’ve come to depend on it!
I created my first bullet journal on December 23, 2021, so it’s been almost two months. I started with what I called a trial bullet journal (to take the pressure off) and on January 1, 2022, I switched to a new journal, one that a client had given me. That dot-grid journal has 156 pages and I have filled 138 of them in just six weeks. When this one is full, I’ll be switching to a new journal (I’ve already purchased the Loyal Companion B5 dot-grid notebook from Archer + Olive). I anticipate enjoying trying out different journals in different sizes. (Archer + Olive has one with black pages that I’m intrigued by.)
Shannon and I published an episode of our podcast Getting to Good Enough on bullet journaling. Is this post has you wanting to hear more, please give it a listen!
If I continue loving this as much as I am now, you can count on my writing more about it. Soon, I’ll create a post about the pens I use for my Bujo and how I store them!
Take a few minutes to clean up your cords
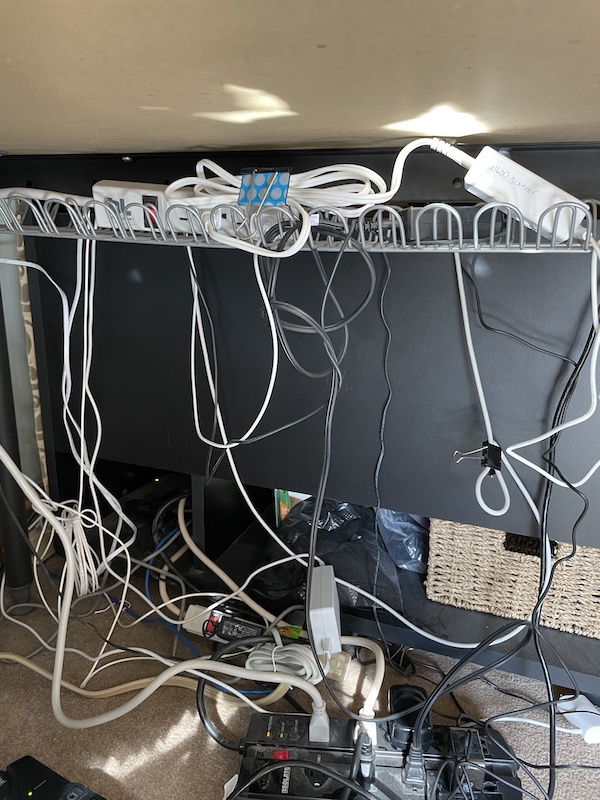
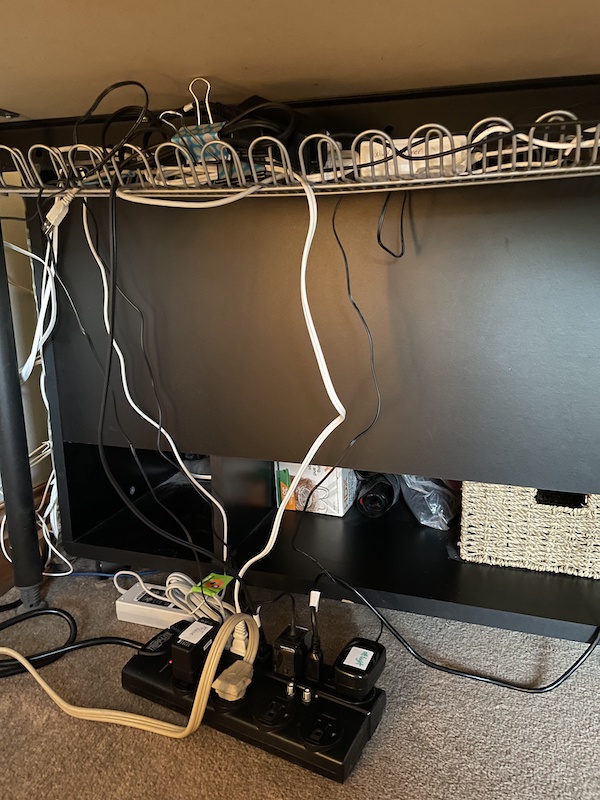
The surge protector in my office failed last week and I had to buy a new one. That surge protector was under my desk, out of sight. I don’t usually pay much attention to it, so when I focused on the situation I was kind of horrified. There were so many things plugged into it, including two other surge power strips (which I’m confident is unwise). There were at least a couple of different outlets involved.
So I took a picture and then got to work.
Here’s the before picture (please don’t judge):
And here’s how it looked about 45 minutes later. There were a number of cords plugged in that weren’t connected to anything at all. There were devices plugged in (like an ethernet hub) that were completely unnecessary. Once I got in there, it was a pleasure to eliminate all that I could. I took a few minutes to label the cords that I kept in use.
Here’s the after photo:
Because I reduced the number of things that were plugged in, I was able to get down to just one surge protector (the new one). And four of its 12 outlets are unused!
As I approached the finish line, I had to channel my inner imperfectionsist. I could have spent more time and made it look better for the after photo, but I didn’t think that was a great use of time. The cord situation is now definitely good enough.
I am delighted to have those extraneous and cords and devices out of the way. If you have a snake nest of cords somewhere in your home, I encourage you to spend a little time going through them. That was 45 minutes well spent!
About Janine

Hello! I’m Janine Adams — a certified professional organizer based in St. Louis, and the creator of Peace of Mind Organizing®.
I love order, harmony + beauty, but I believe that the way that you feel about yourself and your home is what truly matters.
If you’re ready to declutter with a purpose and add more ease to your life, you’ve found the right blog — and you’ve found the right company.
read more »Links
- NAPO St. Louis
- National Association of Productivity and Organizing Professionals
- Organize Your Family History
- Are you interested in becoming a professional organizer?
- Shannon Wilkinson, life coach
- Ravelry
- Peace of Mind Spending
- Getting to Good Enough podcast
- Institute for Challenging Disorganization